Within a couple of weeks of moving to Spain, I realised that the civil war is used frequently as a gauge against which time is judged. Comments such as “these windows haven’t been cleaned since the war”, “the electrical wiring in this apartment hasn’t been examined since the war” or “the company that sold you your kitchen went out of business during war” are (depressingly) commonplace. They also go some way to explain why we have been here for 3 months and only now have gotten our apartment working.
The last three days have been spent sorting through boxes of Blanca’s family belongings in storage. In colloquial terms, some of these boxes seemed to have been untouched since the war. Amongst others, the following nuggets of history featured:
- A copy of “El Practicon”, a 1917 cookbook that Ferran Adria cites as being where he learnt to cook.
- Hugh Thomas’s 1961 book on “The Spanish Civil War”. This has now been recommended to me as “optional” reading. Note: yes, I realise that this was written after the war.
- A steel Italian pasta maker still in its original box.
The pasta maker was put into immediate use on our return to Granada this afternoon. This was my first time cooking pasta from scratch. In Spanish, “la pasta” means money. Despite the fact that we have now been in Spain in “business planning mode” for a few months, we are yet to discover the art of making money at home. We’re working on it, but I’m not sure I’ll blog it.
The following instructions come from Marcella Hazan’s “The Essentials of Classic Italian Cooking”. Knowing how I love instructions that aren’t exactly correct, Blanca chose to modify these in a few key places along the way. I suffered so that you can have the 100% accurate directions to making pasta in the home...
Ingredients (for 2)
115 g flour
2 eggs (medium)
1 Italian pasta maker (not edible)
115 g flour
2 eggs (medium)
1 Italian pasta maker (not edible)
The first modification that we would suggest is that the above proportion does not suit conventional soft flour. The ratio could be closer to 4:4 of flour to eggs i.e. 400 g to 4 eggs for approximately 4 people.
Combining the eggs and the flour
Another modification would be to not add all the egg at once, it is best to break the eggs into a glass as this will allow you control the amount that you add to the pasta mixture. Beat them as you would an omelette. Next place the flour in a mound on the worksurface. Hollow a hole in the centre into which you put half of the mixture. Work the flour and eggs together with your fingers and the palms of your hand. You should aim for a smooth mixture that isn’t moist.
Pastry still strikes fear into my heart and it can be quite intimidating at first. Like dogs, it smells fear so don’t be afraid of it. Marcella gives a good tip for when the pasta is ready… wash and dry your hands; press your thumb into the centre of the dough. It should come out clean with no sticky mass on it.
Blanca says that when her class was learning pasta making in Le Cordon Bleu, often they would over flour the dough. It is easier to mix wet into a dough than dry and for this reason the students would wait until the chef’s back was turned, bin their dough and start again. I have this image of students carrying over dry dough into the pubs at night or around in their bags for weeks afterwards.
Kneading
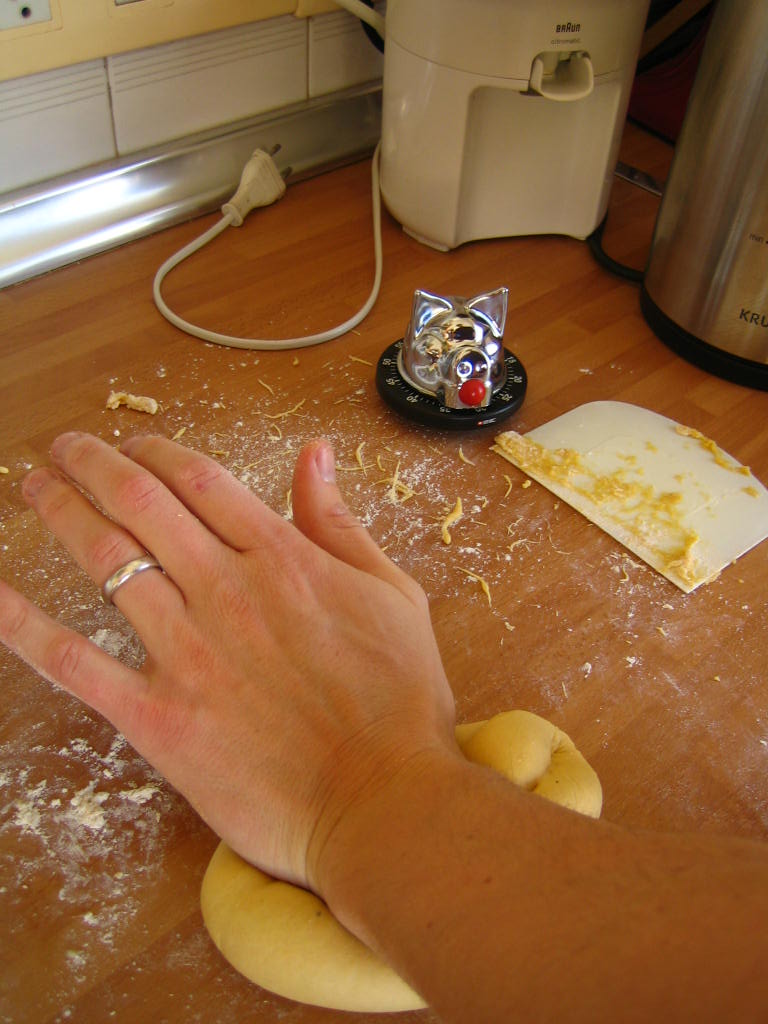
One of the great techniques of dough making, kneading, focuses on elongating and toughening the gluten strands that have developed within the pasta (combination of the egg and flour protein).
Place the heel of your hand on the top of the dough and push away from you. With your fingertips bring the back of the dough up and over the front. Give the dough a quarter turn. Repeat the process with your other hand. Always ensure that you are rotating in the same direction in order to develop longer gluten strands. Continue the kneading process for about 8 minutes until the dough is very smooth.
Thinning
We used the pasta machine that we found when digging through the family trove. This is made by Marcato Company of, eh, Italy, who obviously have bought out or scared away all of their competition; it seems to be the only design of pasta maker that you see in books or on the web. This company started “at a craft level” in 1938. Their standard model is the futuristically named “Atlas 150”, I’m not sure about the 149 that went before, but it works very well. I just noticed that the guarantee for our pasta maker expired after 3 years… I guess that covered its first 1/3 of living in a box (I’m a living in a cardboard box). With flavours of its fine Italian heritage, the Atlas 150 has a clamp that locks it to the kitchen table, this is mandatory if your pasta is planning on escaping during the torture.

The instructions are pretty straightforward:
1. Work with a handful of pasta at a time.
2. Set the rollers to their widest width. Flour the dough to ensure that it doesn’t stick. Feed it once through the rollers.
3. OPTIONAL: watch as the handle falls off, pick it up and put it back in the machine.
4. Fold the pasta across its width and repeat the process two or three times.
5. Reduce the separation of the rollers and repeat the process twice for every setting.
6. OPTIONAL: watch as the handle falls off every time you adjust the setting. Bend down and pick it up each time.
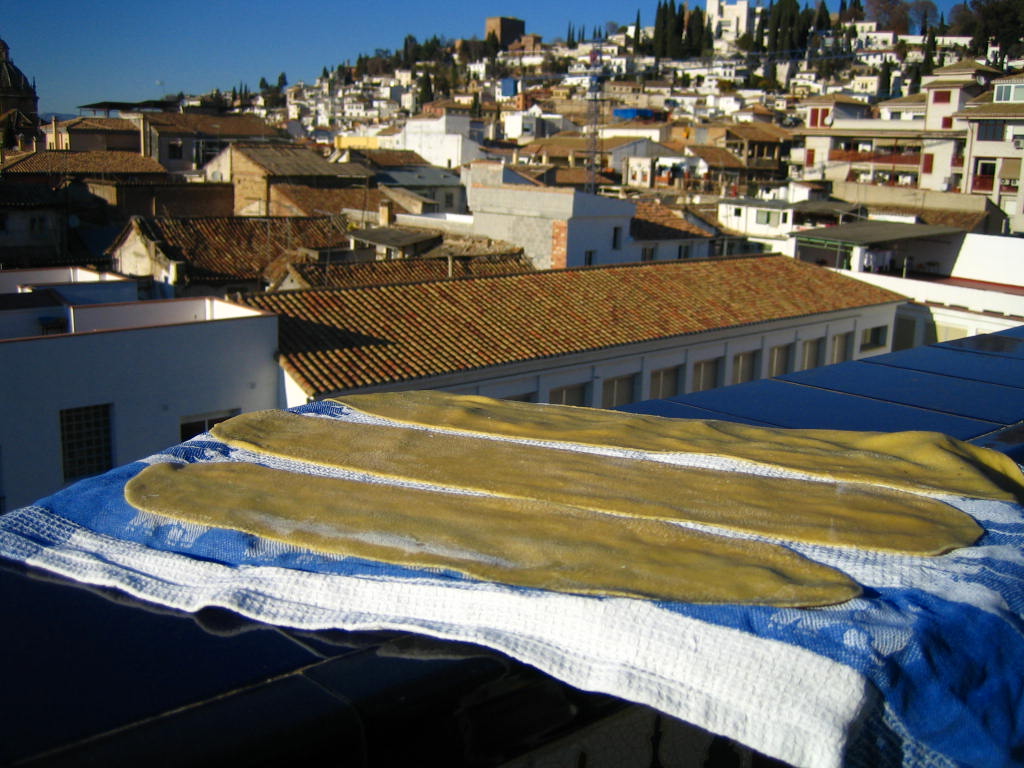
Whilst drying, cultured pasta will often admire the view and historical places of interest of the old Jewish quarter of Granada...
7. Leave the pasta to dry on a towel for about 10 minutes, turning occasionally.
Cutting
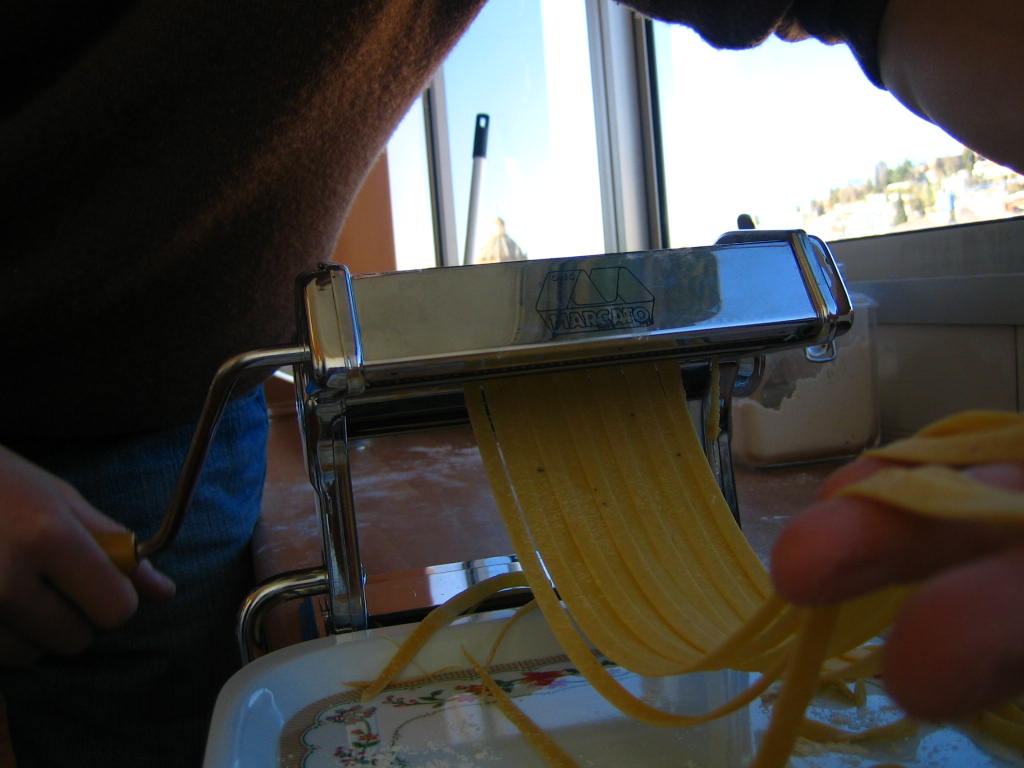
This is only going to make sense if you have a cutter on your pasta machine (comes standard with the Atlas 150). We used the narrow cutters for tagliolini (broad for fettuccine). Feed the strips through the pasta cutter. As the ribbons emerge, separate them and spread on a tea towel.
There are over 300 shapes of pasta, for anyone with an interest in learning them all, I found the highly comprehensive (I nearly wrote very interesting) “World Dictionary of Pasta Shapes and Names”.

Cooking
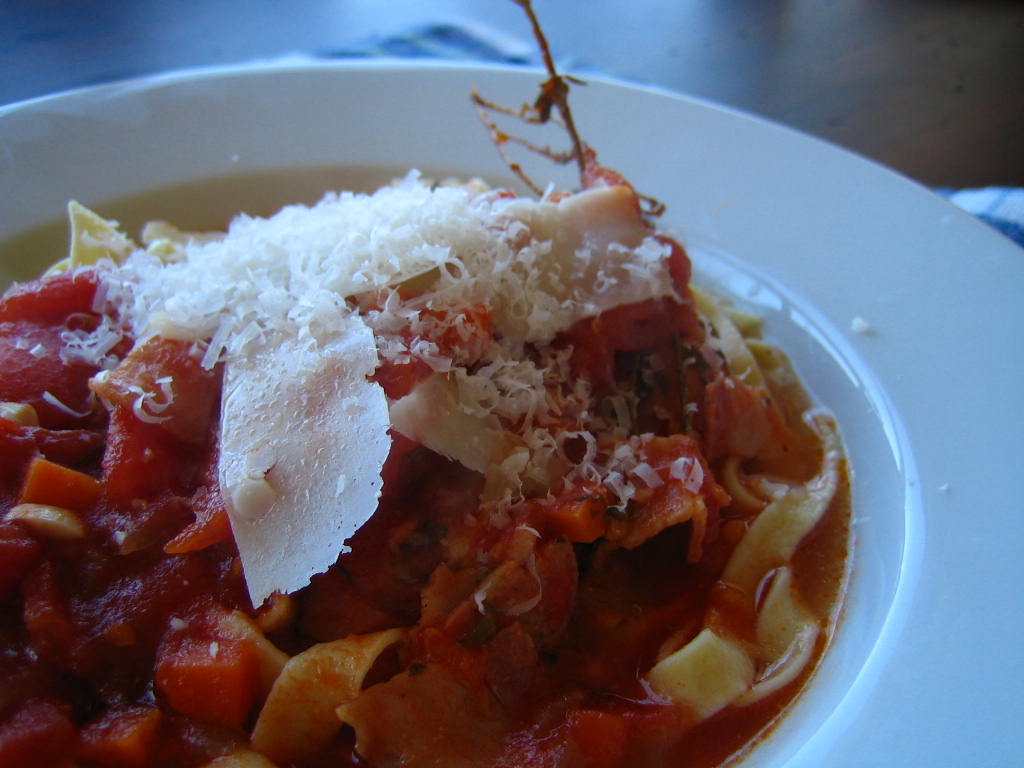
Notably, above there is no salt included in the pasta mixture. The only salt that you use should be added during the cooking. Boil plenty of water, add salt and return to the full boil. Put all of the pasta in at one go, return to the boil (use the lid to hasten the return) and cook uncovered.
Cook until the pasta is al dente, with bought pasta this is usually signified by the fact that no white remains when you bite into the pasta. For homemade pasta this will not work. The pasta will never be as firm or chewy as bought. When the pasta floats and still offers some resistance, it is ready (2-3 minutes).
Related and next on the cards for pasta making, it’s going to be Japanese Noodle Making…


3 comments:
Hey Coops,
I'm a little worried about myself! I came onto your blog not only to see how you and Blancs are getting on, but also to see what you have been cooking! Scary!!!
Krish and I made pasta lots (well a few times) when we were in Tanzania..... it's amazing what you will attempt when you don't have convenience food surrounding you! I really enjoyed it. So much, we have asked for a pasta machine for Xmas from parents.
Missing you guys lots, and can't wait to see you in the new year. H x
Posted by helen
I've been in Spain twice. This blog has been increasing my knowledge about the country, specially in this historical topics mentioned above, The Spanish Civil War is a great book, thanks for sharing this.
I've eaten Pasta since ever, and this is just the first time I saw how to do it... I know it sounds stupid, but it's true, and I feel ashamed about the fact.
Post a Comment